
React Testing Beginner's guide | RTL & Jest Part - 1
Testing react application made easy in simple steps. Understanding basic concepts of Jest and React Testing Library


Table of contents
If you are a person who just finished Learning React Framework and got fairly good at it. You start giving Interviews, You almost got the skills for developing Single Page applications. You are having a decent conversation with the interviewer until he asks you
“How do you test your Application?”.
This Blog covers the basic understanding of Testing in React.
Why do we need to test?
As a developer, our primary goal is to build software that WORKS!
It doesn’t matter how much thought we put into improving user experience and performance if it doesn’t work. We check if our software works as it’s expected.
What is Jest? When did I install its dependencies?
Jest is a javascript testing framework
Jest is a test runner that finds tests, runs the tests, determines whether the tests passed or failed, and reports it back in a human-readable manner.
If you wanna know how Jest is written: The blog by kent C. Dodds
React out of the box comes with jest and RTL with useful defaults. If we look at package.json inside the project folder, we see testing-library package dependencies.
"dependencies": {
    "@testing-library/jest-dom": "^5.16.5",
    "@testing-library/react": "^13.4.0",
    "@testing-library/user-event": "^14.4.3"
        ....
        "react-scripts": "5.0.1",
}
We don’t see jest package? However, we do see the react-scripts package. If we open the node_modules folder that pins down the react-scripts package.json. We see Jest as its dependency.
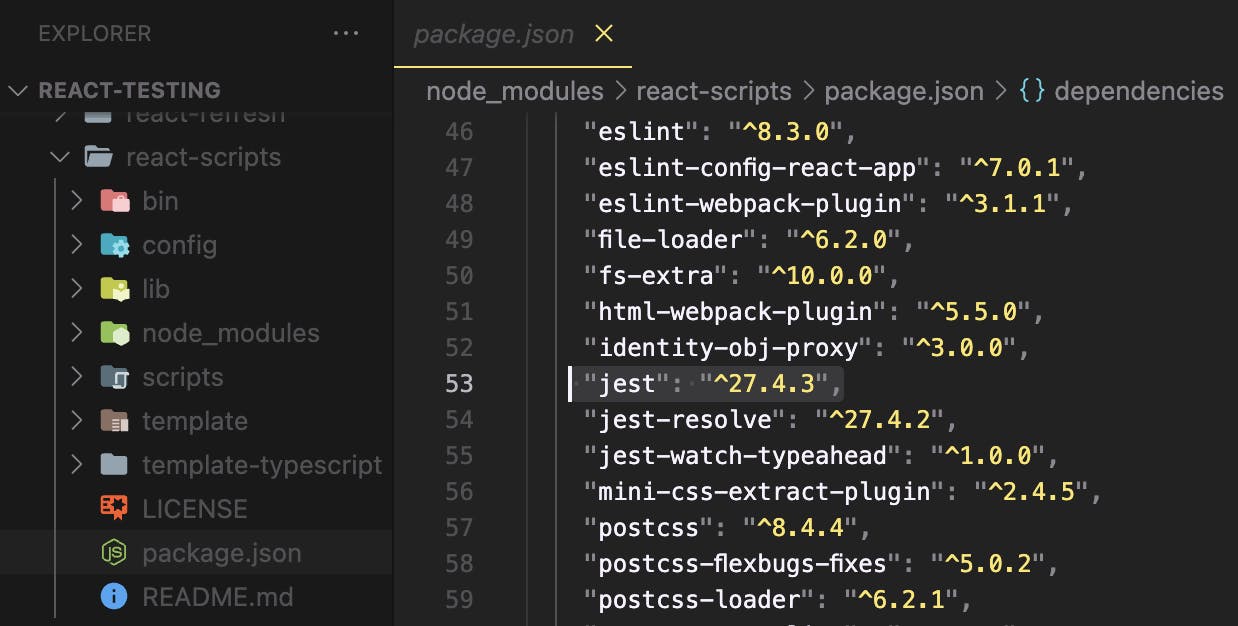
So in the node_module folder, Jest does exist even though it is not a direct dependency created with create-react-app.
What is React Testing Library?
It is a javascript utility that provides virtual DOM for testing React Components.
There's no virtual DOM while running a test. So the React Testing library provides a virtual DOM which we can use to interact with and verify the behavior of a react component.
The Core library is called DOM Testing Library and RTL is simply a wrapper around this core Library to test React applications in an easier way.
Types of test
Unit Tests
Integration tests
End to End tests
What is a test?
An Automated test is a code that throws an error when the actual output does not match the expected output.
Your first test
Create a new component in your freshly installed create-app inside src/components/HelloWorld.
Let’s name it Helloworld.tsx
export const HelloWorld = () => {
  return <div>Hello World</div>
}
Now let’s write a test for it. In the same directory create a new file with the name Helloworld.test.tsx
Now let’s remember all we need is a test method that is globally available in create-react-app project
test() method has two parameters:
First Parameter: string which can be the name of the test
Second Parameter: callback function which is run for checking the expected and actual output
Inside the second parameter. Call render method from testing-library with the Helloworld.tsx as a component.
Now when we have a virtual DOM let’s check if the text Hello World is present.
import screen at the top and use getByText available on the object and let’s catch it in a constant helloworldElement.
Finally, we can use expect method from jest to test our assertion.
import {render,screen} from "@testing-library/react"
test('Helloworld renders successfully', () => {

  render(<Helloworld />) // this is where a virtual DOM is created

  const helloWorldElement = screen.getByText('Hello World')
  expect(helloWorldElement).toBeInTheDocument()
}
Now in the terminal run npm run test or yarn test

A test is useless if it doesn’t fail. So Let’s make a small change in the component to check if the test is running as expected.
export const HelloWorld = () => {
return <div>Hello World of testing</div>
}

RTL Queries
Let’s get a little deep into RTL, Starting with the RTL Queries.
Queries are the methods that Testing Library provides to find elements on the page.
To find a single element on the page. We have
getBy..
queryBy..
findBy..
To find multiple elements on the page. We have
getAllBy..
queryAllBy..
findAllBy..
each of the methods can be suffixed to form an actual query.
The suffix can be one of Role, LabelText, PlaceholderText, Text, DisplayValue, AltText, Title, and finally TestId.
Let’s start with the single element "getByRole"
getByRole queries for elements with the given role.
Role refers to the ARIA (Accessible Rich Internet Applications) role which provides semantic meaning to the content to ensure people using assistive technologies are able to use them.
Let’s look at an example of the semantic roles of HTML elements
Button element has a button role
Anchor element has a link role
h1 to h6 elements have a heading role
checkboxes have a checkbox role
radio buttons have a radio role, and so on…
if you’re working with elements that do not have a default role or if you want to specify a different role, the role attribute can be used to add the desired role. example navbar links can have button role=’button’.
Let's look at another example. We have a fairly simple component that renders a form
const Form = () => {
  return (
    <form>
      <div>
        <label htmlFor="name">Name</label>
        <input type="text" id="name" />
      </div>
    </form>
  )
}

export default Form
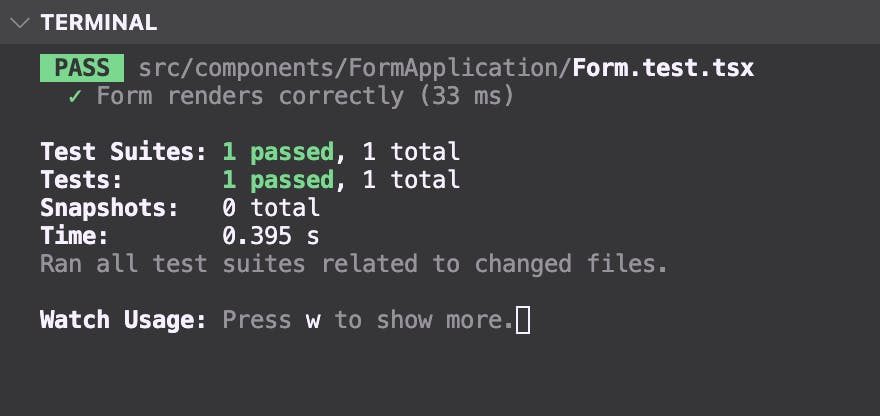
It’s corresponding test that asserts if the given textBox input renders
here we make use of the getByRole query from RTL.
import { render, screen } from '@testing-library/react'
import Form from './Form'

test('Form renders correctly', () => {
  render(<Form />)
  const nameInputElement = screen.getByRole('textbox')
  expect(nameInputElement).toBeInTheDocument()
})
Now let’s add more different types of input in the form.
const Form = () => {
  return (
    <form>
      <div>
        <label htmlFor="name">Name</label>
        <input type="text" id="name" />
      </div>
      <div>
        <input type="checkbox" />
      </div>
    </form>
  )
}

export default Form
When two or more tests are there for a component we can combine the tests inside a describe method. describe also takes two parameters, the first is the string, and the second is the callback function.
This time we make use of the ‘checkbox’ property of getByRole method.
Watch for the terminal and it succeeds
import { render, screen } from '@testing-library/react'
import Form from './Form'

describe('Form', () => {
  test('Renders correctly', () => {
    render(<Form />)
    const nameInputElement = screen.getByRole('textbox')
    expect(nameInputElement).toBeInTheDocument()
  })

  test('Renders a checkbox correclty', () => {
    render(<Form />)
    const checkboxElement = screen.getByRole('checkbox')
    expect(checkboxElement).toBeInTheDocument()
  })
})
Priorities while using RTL queries
getByRole
getByLabelText
getByPlaceholderText
getByText
getByDisplayValue
getByAltText
getByTitle
getByTestId
Your first priority to access should always be getByRole , if for a reason getByRole can't be used. Look for getByLabelText, it really helps working with forms. Followed by the rest of the methods. If in case nothing can be used the last option is to use getByTestId.
Now let’s look at multiple elements “ getAllByRole.. ”
Let’s start with a simple component that lists downs the name of cities and their corresponding tests
type CitiesProps = {
  cities: string[]
}
const Cities = (props: CitiesProps) => {
  const { cities } = props
  return (
    <div>
      <h1>Famous cities in the world</h1>
      <ul>
        {cities.map((city: string) => {
          return <li key={city}>{city}</li>
        })}
      </ul>
    </div>
  )
}

export default Cities
import { render, screen } from '@testing-library/react'
import Cities from './Cities'

describe('Cities', () => {
  const cities = ['Paris', 'New York', 'London', 'Bangkok']

  test('renders correctly', () => {
    render(<Cities cities={cities} />)
    const headingElement = screen.getByRole('heading', {
      name: 'Famous cities in the world',
      level: 1,
    })
    expect(headingElement).toBeInTheDocument()
  })

  test('renders a list of cities', () => {
    render(<Cities cities={cities} />)
    const listBoxElement = screen.getByRole('list')
    expect(listBoxElement).toBeInTheDocument()
  })

  test('renders a list items of cities', () => {
    render(<Cities cities={cities} />)
    const listItemsElement = screen.getAllByRole('listitem')
    expect(listItemsElement).toHaveLength(cities.length)
  })
})
This is a small blog that should get you started with testing components in react. In the Next blog let’s look at how to mock user events in react tests.
Thank you for reading, I hope this helps in your journey.
Keep rocking, Keep coding 💻